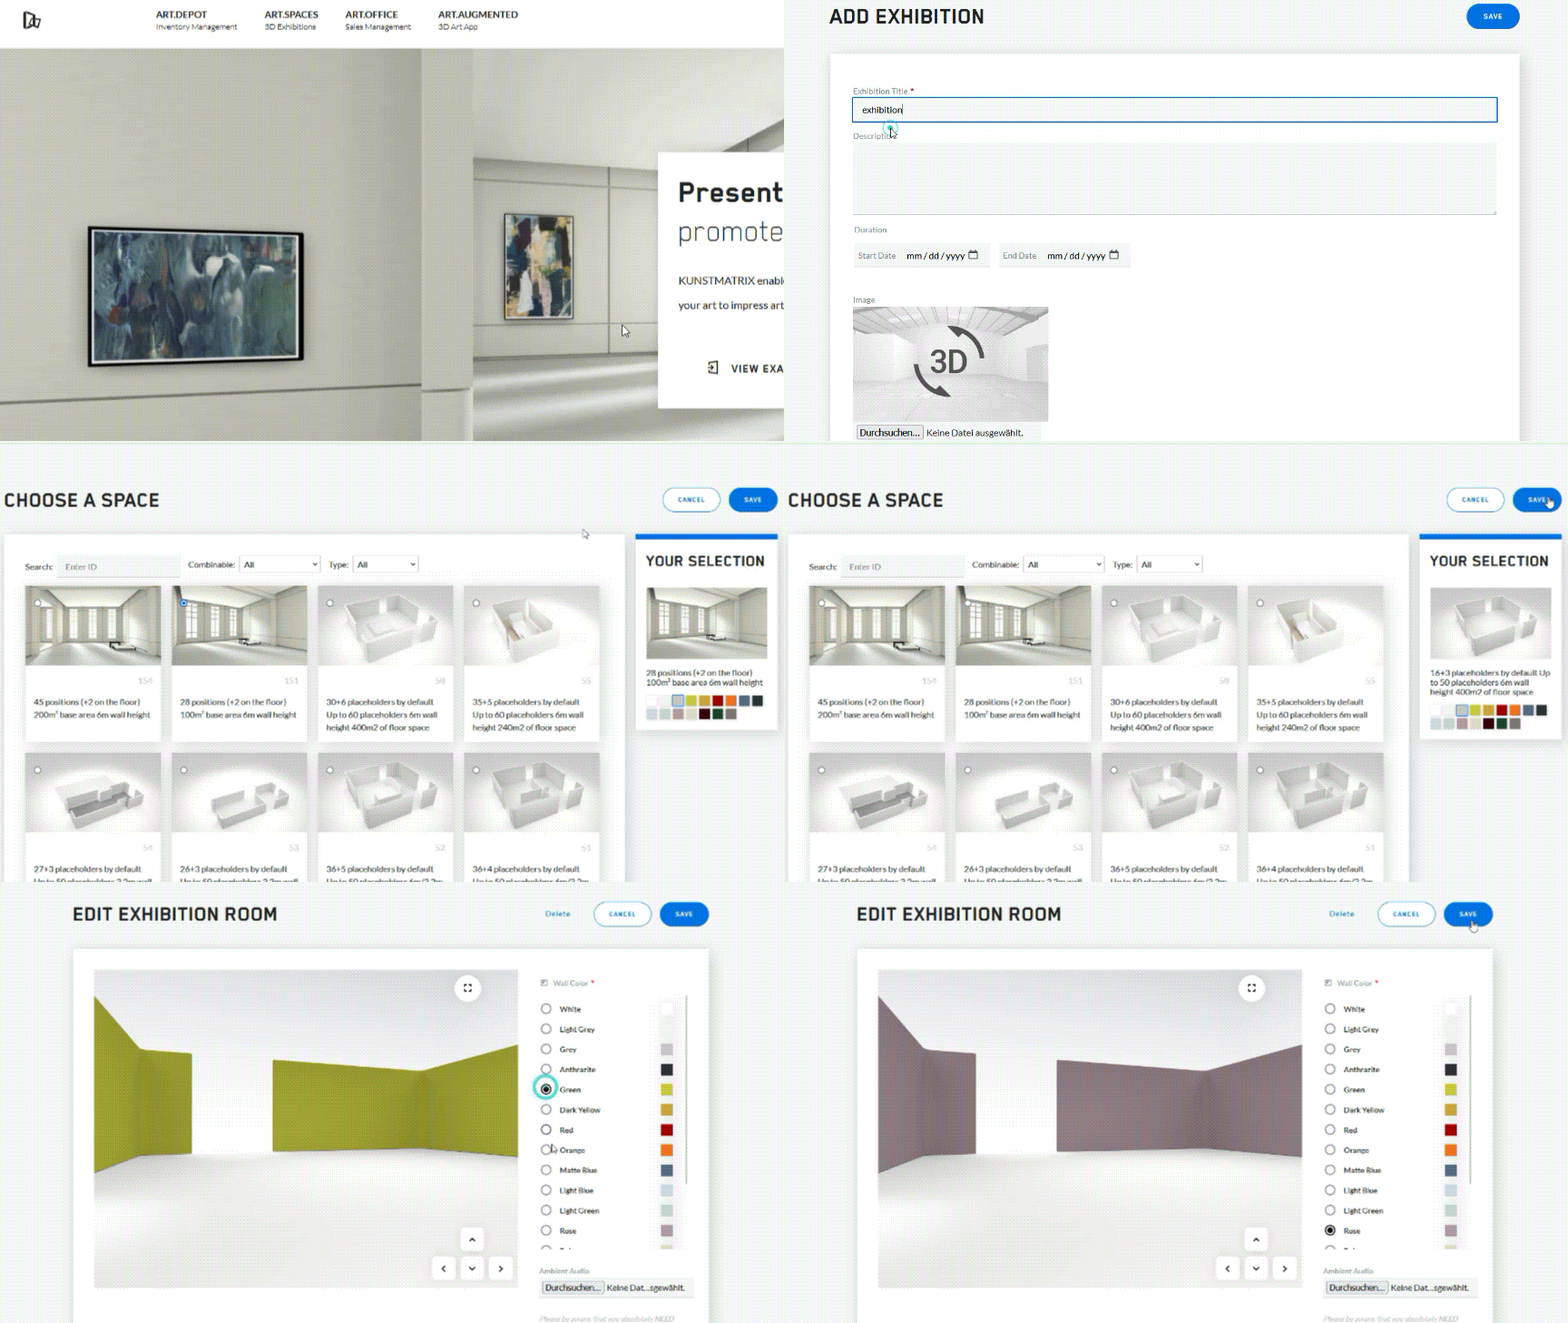
Creating a virtual gallery is done in a few easy steps:
- Create an account
If you have not registered already, please go ahead and create a free account. - Upload your art
Once you created at least one artwork to try out all the other features we offer, this will make more sense. The upload link will be displayed right after the registration, but if you want see how it works beforehand, please have a look at the tutorial: How to Upload Art. - Create a virtual exhibition
This is done in art.spaces. Click on + Exhibition, and enter a title. You can add a description text of your project, set the runtime, and assign a Title Image.
Before you start, we recommend to watch our short video tutorial: How to Create a Virtual Exhibition Select your room template and wall color
After saving the initial exhibition, you can select the most suitable room for your project, filter by 'stanadlone' and 'combinable' and assign your preferred wall color.
Upgrade and publish
Publishing content (art and exhibitions) is only possible with one of our paid plans starting from € 10 per month.
If you represent more than one artist, it might be a good idea to start with the REGULAR package.
Further links: