This short tutorial explains how to create and add full 3D Sculpures to your gallery. Billboard sculptures are shown in the previous chapter. This example exhibition illustrates the differences between Billboard and full 3D sculptures. Here we have put together a special exhibition of 3D sculptures.
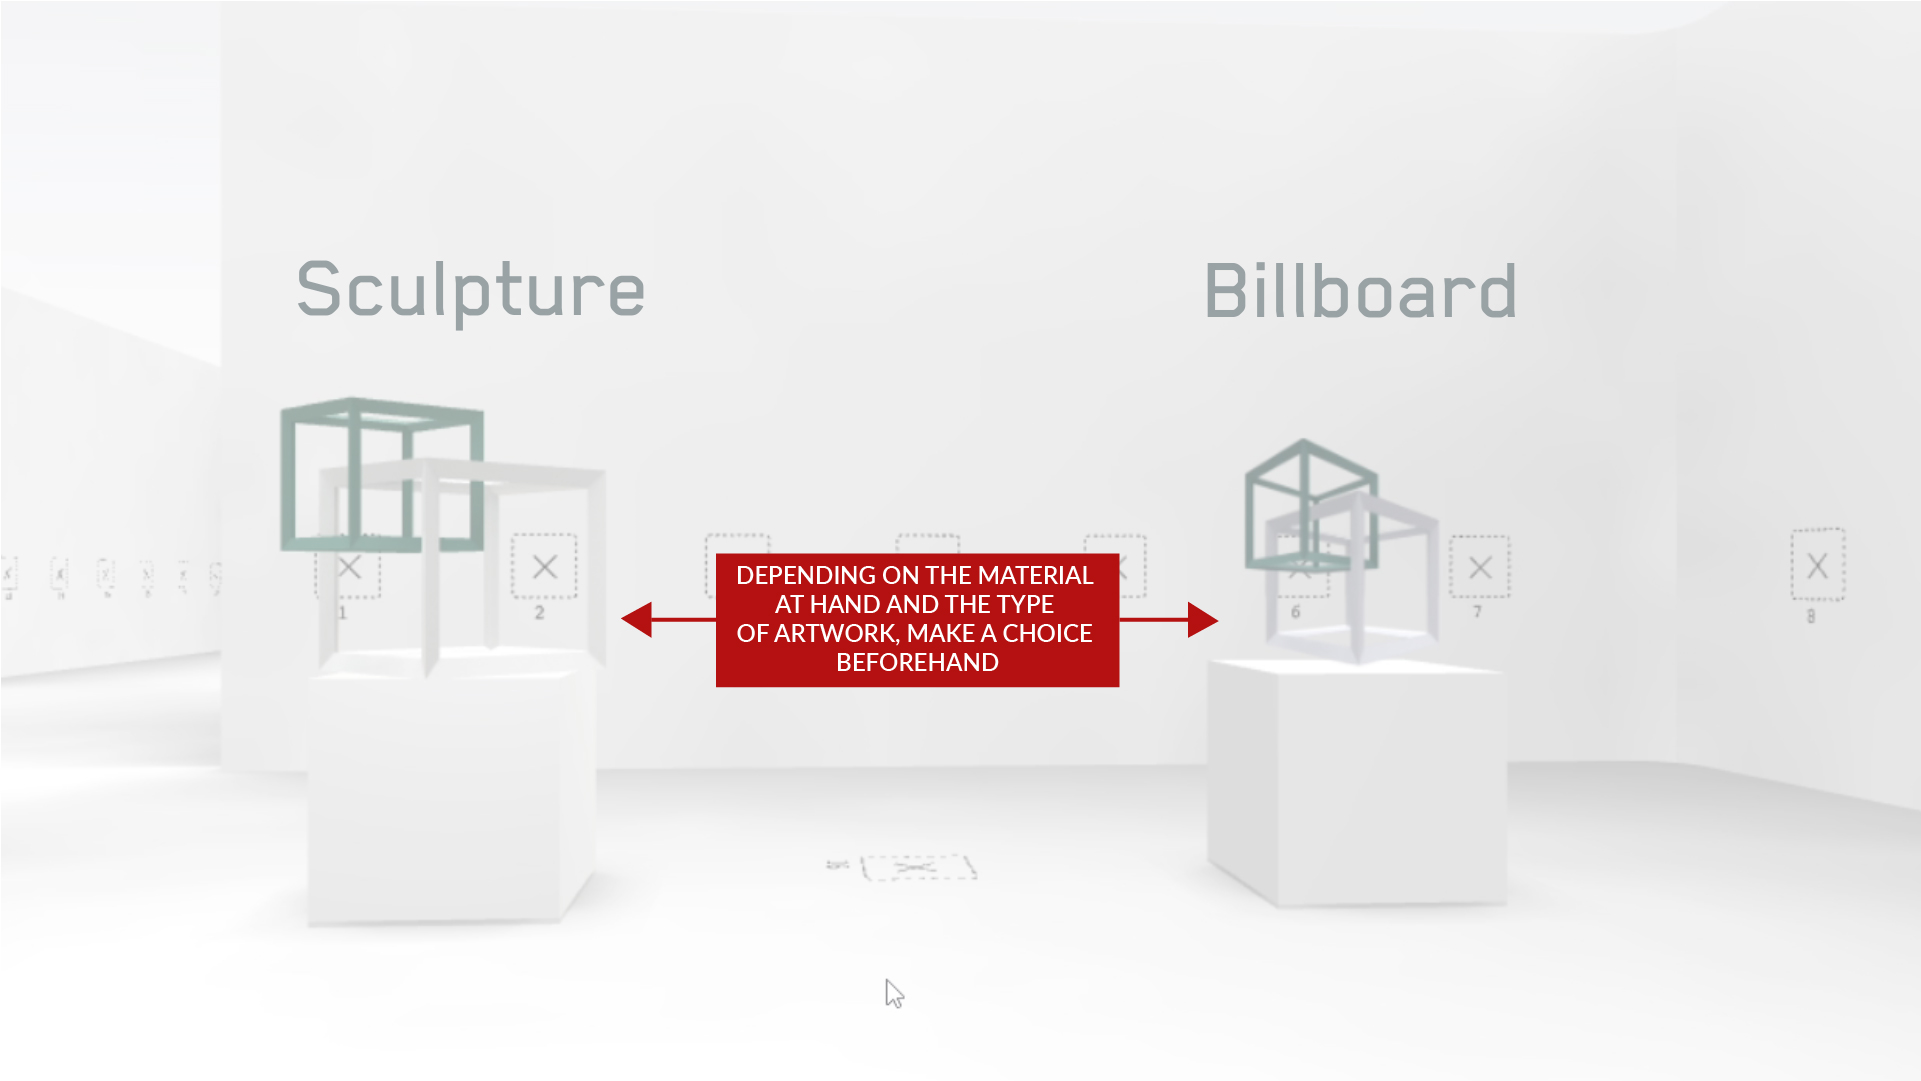 Both sorts of sculptures have their advantages, and depending on how you wish to present your artworks, chose one and prepare your files.
1
SCULPTURES need to be unlocked for your account.
Your SCULPTURE tab in the artwork upload needs to look like this. If not, please contact us.
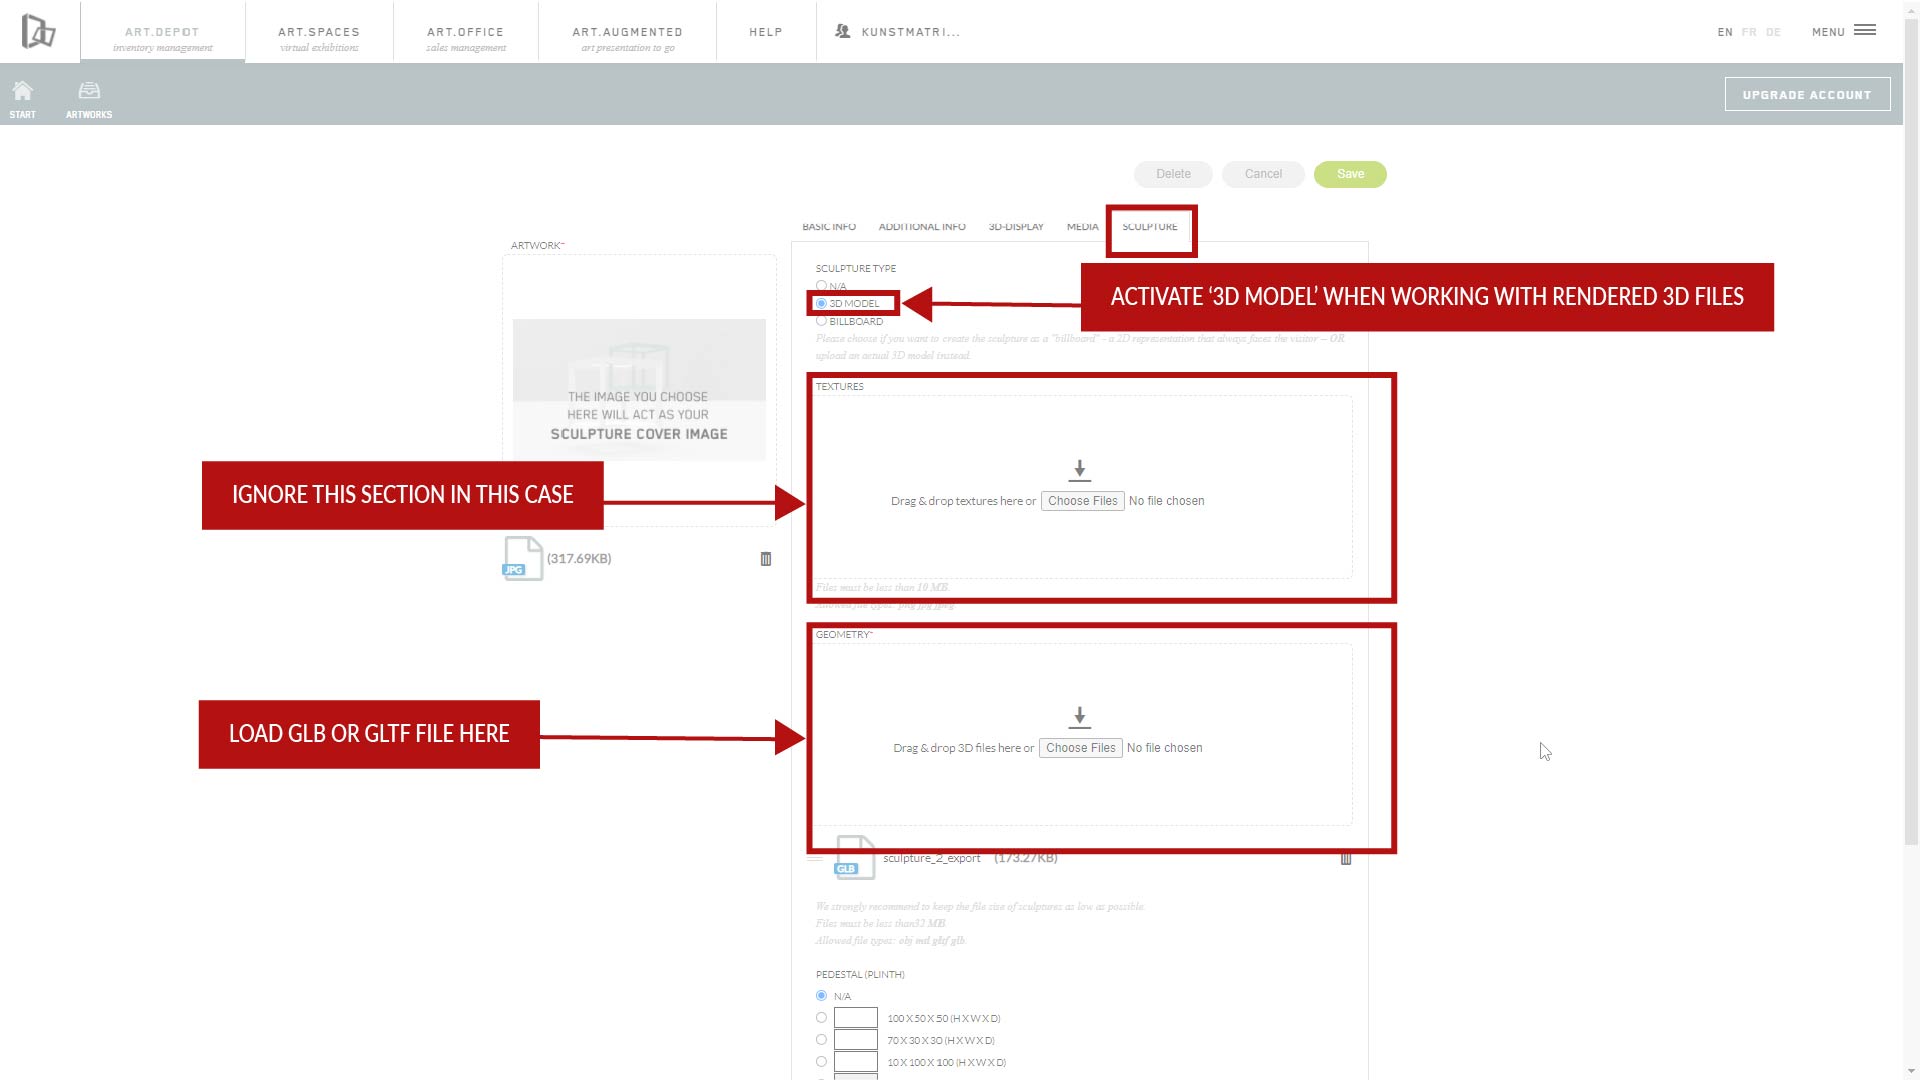
The relevant files are uploaded here in the SCULPTURE tab for both sorts of our sculpture options. The first one: Billboard, which is a photo based 2.5D principle.
OR the second option: 3D MODEL, which uses a rendered 3D model file such as a glb or gltf.
You need to know beforehand which method to use, and prepare your files accordingly.
Both sorts of sculptures have their advantages, and depending on how you wish to present your artworks, chose one and prepare your files.
1
SCULPTURES need to be unlocked for your account.
Your SCULPTURE tab in the artwork upload needs to look like this. If not, please contact us.
The relevant files are uploaded here in the SCULPTURE tab for both sorts of our sculpture options. The first one: Billboard, which is a photo based 2.5D principle.
OR the second option: 3D MODEL, which uses a rendered 3D model file such as a glb or gltf.
You need to know beforehand which method to use, and prepare your files accordingly.
 The technically advanced solution: a 3D sculpture, created with modeling software and then uploaded to the SCULPTURE tab. These need to be prepared and tested beforehand.
You need 1 glb or gltf file with your sculpture already scaled to fit the 1 unit = 1 meter size of our platform, placed on the absolute origin point of the editor.
All components – both shape and skin – need to be rendered to one final file before the upload.
Have an extra look at the FAQ article and keep the file size of your glb file in mind.
The smaller your file is, the faster the whole gallery will load.
Test your file in the Babylon Sandbox before you load it in Kunstmatrix. If you have error reports there, you will experience display issues in the gallery.
2
The technically advanced solution: a 3D sculpture, created with modeling software and then uploaded to the SCULPTURE tab. These need to be prepared and tested beforehand.
You need 1 glb or gltf file with your sculpture already scaled to fit the 1 unit = 1 meter size of our platform, placed on the absolute origin point of the editor.
All components – both shape and skin – need to be rendered to one final file before the upload.
Have an extra look at the FAQ article and keep the file size of your glb file in mind.
The smaller your file is, the faster the whole gallery will load.
Test your file in the Babylon Sandbox before you load it in Kunstmatrix. If you have error reports there, you will experience display issues in the gallery.
2
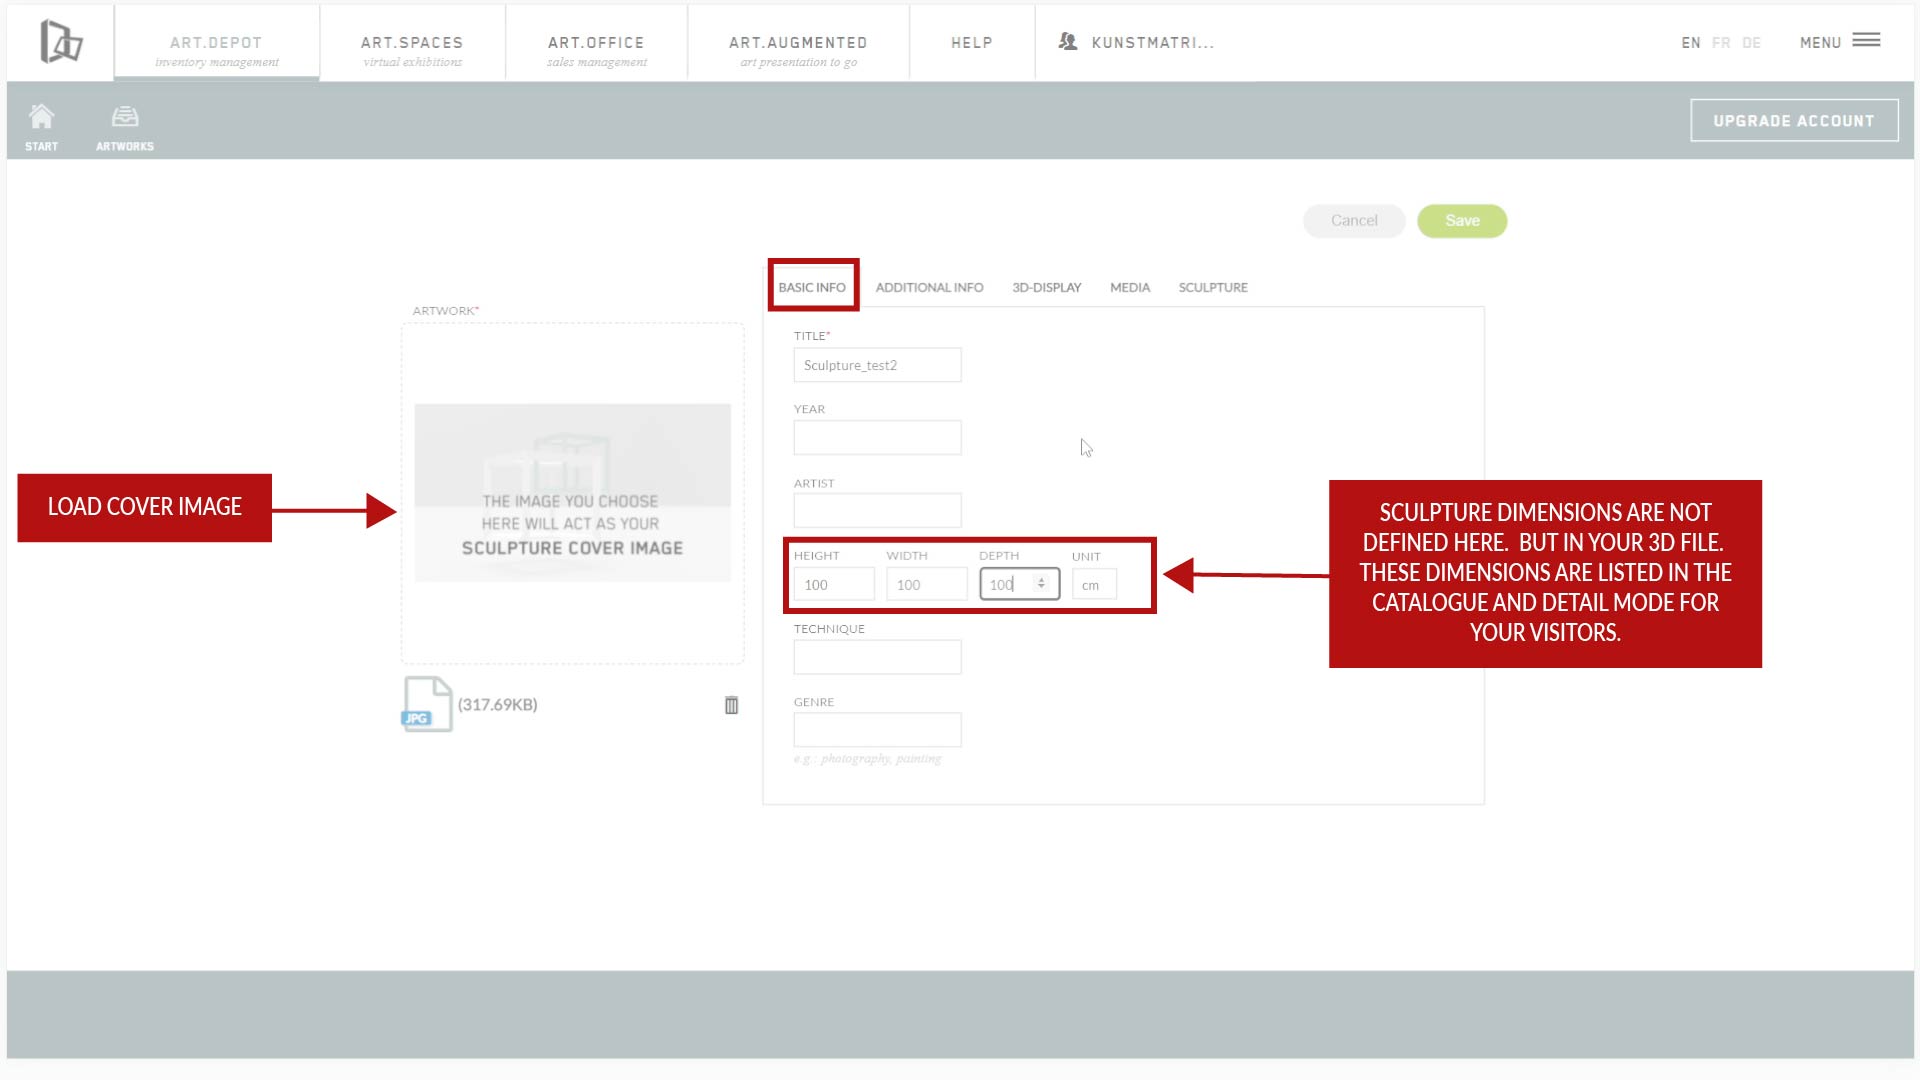
 Have a Cover jpg prepared. The jpg is needed as an image for the catalogue and your artwork manager. You can use an installation view of the sculpture, or any screenshot from an editor, or just a proxy image.
When creating the actual artwork, fill in the BASIC INFO tab with all the ususal information, and keep the size in mind that you want to have listed for the work in the catalogue.
Upload the jpg cover image in the BASIC INFO tab, and then proceed to the SCULPTURE tab for the actual sculpture file.
Activate 3D MODEL as your sculpture type there. For full 3D sculpture, IGNORE the ‘textures’ field. Scroll past, load your glb file in the ‘Geometry’ field of the form, and decide on an optional plinth. Then save all of this with the green button.
3
Have a Cover jpg prepared. The jpg is needed as an image for the catalogue and your artwork manager. You can use an installation view of the sculpture, or any screenshot from an editor, or just a proxy image.
When creating the actual artwork, fill in the BASIC INFO tab with all the ususal information, and keep the size in mind that you want to have listed for the work in the catalogue.
Upload the jpg cover image in the BASIC INFO tab, and then proceed to the SCULPTURE tab for the actual sculpture file.
Activate 3D MODEL as your sculpture type there. For full 3D sculpture, IGNORE the ‘textures’ field. Scroll past, load your glb file in the ‘Geometry’ field of the form, and decide on an optional plinth. Then save all of this with the green button.
3
 Proceed to the exhibition, to place it in there.
Find a floor placeholder, and drag it on there. Click on it for detail mode. Move it across the floor or up and down with the 3 directional arrows.
Proceed to the exhibition, to place it in there.
Find a floor placeholder, and drag it on there. Click on it for detail mode. Move it across the floor or up and down with the 3 directional arrows.
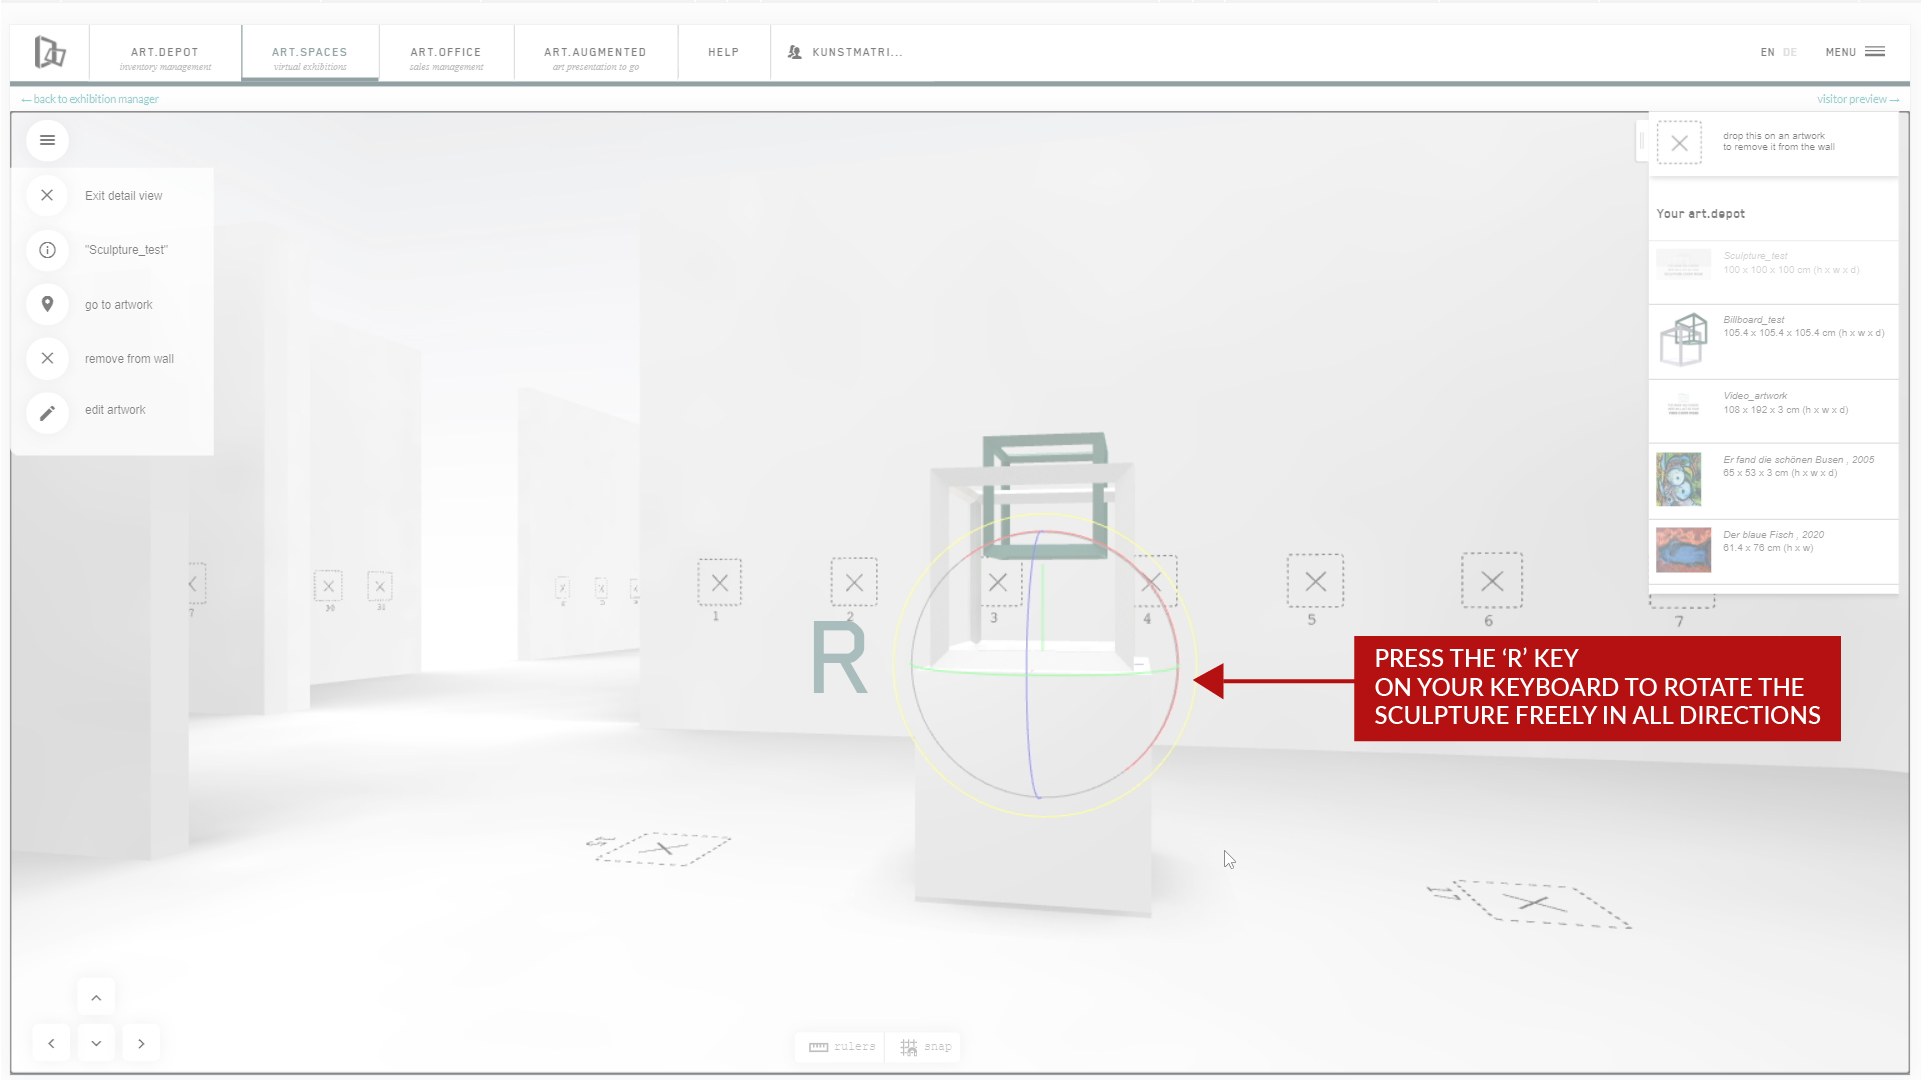 Use the R key for rotation, and the T key for toggle (up/down/across). However, if you have selected a plinth or base, the distance to that is determined by the height above the Zero or origin point in the 3D editor. The display size for full 3D sculptures can’t be adjusted or scaled later on. unlike 2D works or billboards, but needs to be done within the actual 3D file beforehand.
If your sculpture ‚floats‘ on the base, you need to edit the file used in the SCULPTURE tab. The base does not rotate or move with the sculpture when positioning it in the room. You should test this in the exhibition, and possibly edit the glb file.
Note: sound or videos cannot be assigned to sculptures just yet.
You can also use wall placeholders for sculptures.
If you rather want to use one or more photographs of a sculpture, and keep it simpler, have a look at our Billboard method, explained in the previous video.
Use the R key for rotation, and the T key for toggle (up/down/across). However, if you have selected a plinth or base, the distance to that is determined by the height above the Zero or origin point in the 3D editor. The display size for full 3D sculptures can’t be adjusted or scaled later on. unlike 2D works or billboards, but needs to be done within the actual 3D file beforehand.
If your sculpture ‚floats‘ on the base, you need to edit the file used in the SCULPTURE tab. The base does not rotate or move with the sculpture when positioning it in the room. You should test this in the exhibition, and possibly edit the glb file.
Note: sound or videos cannot be assigned to sculptures just yet.
You can also use wall placeholders for sculptures.
If you rather want to use one or more photographs of a sculpture, and keep it simpler, have a look at our Billboard method, explained in the previous video.