This tutorial explains how to create and add Billboard Sculptures to your gallery. Full 3D sculptures are shown in a different tutorial. This example exhibition illustrates the differences between Billboard and full 3D sculptures.
 Both sorts of sculptures have their advantages, and depending on how you wish to present your artworks, chose one and prepare your files.
1
SCULPTURES need to be unlocked for your account.
Your SCULPTURE tab in the artwork upoad needs to look like this. If not, please contact us.
The relevant files are uploaded here in the SCULPTURE tab for both sorts of our sculpture options. The first one: Billboard, which is a photo based 2.5D principle.
OR the second option: 3D Model. which uses a rendered 3D model file such as a glb or gltf.
You need to know beforehand which method to use, and prepare your files accordingly.
Both sorts of sculptures have their advantages, and depending on how you wish to present your artworks, chose one and prepare your files.
1
SCULPTURES need to be unlocked for your account.
Your SCULPTURE tab in the artwork upoad needs to look like this. If not, please contact us.
The relevant files are uploaded here in the SCULPTURE tab for both sorts of our sculpture options. The first one: Billboard, which is a photo based 2.5D principle.
OR the second option: 3D Model. which uses a rendered 3D model file such as a glb or gltf.
You need to know beforehand which method to use, and prepare your files accordingly.
 The easier solution: a Billboard. It always faces the visitor in the exhibition, but has a sculptural appearance and is done with easier tools than a full 3D sculpture. It is based on a 2D image with the background removed.
You need 1 (or more) png file(s) with your sculpture on a transparent background.
This principle works with just one png file, very simply.
If you are not familiar with manually removing the background with image editing software, such as photoshop, then use the practical web tool remove.bg - which will let you download a png in the desired form with a few clicks.
Have an extra look at the FAQ article and keep the file sizes of your png files in mind. Also, please avoid special characters and long filenames - keep the file names simple :-)
The smaller your png files are, the faster the whole gallery will load.
The easier solution: a Billboard. It always faces the visitor in the exhibition, but has a sculptural appearance and is done with easier tools than a full 3D sculpture. It is based on a 2D image with the background removed.
You need 1 (or more) png file(s) with your sculpture on a transparent background.
This principle works with just one png file, very simply.
If you are not familiar with manually removing the background with image editing software, such as photoshop, then use the practical web tool remove.bg - which will let you download a png in the desired form with a few clicks.
Have an extra look at the FAQ article and keep the file sizes of your png files in mind. Also, please avoid special characters and long filenames - keep the file names simple :-)
The smaller your png files are, the faster the whole gallery will load.
 2
Have a Cover image prepared.
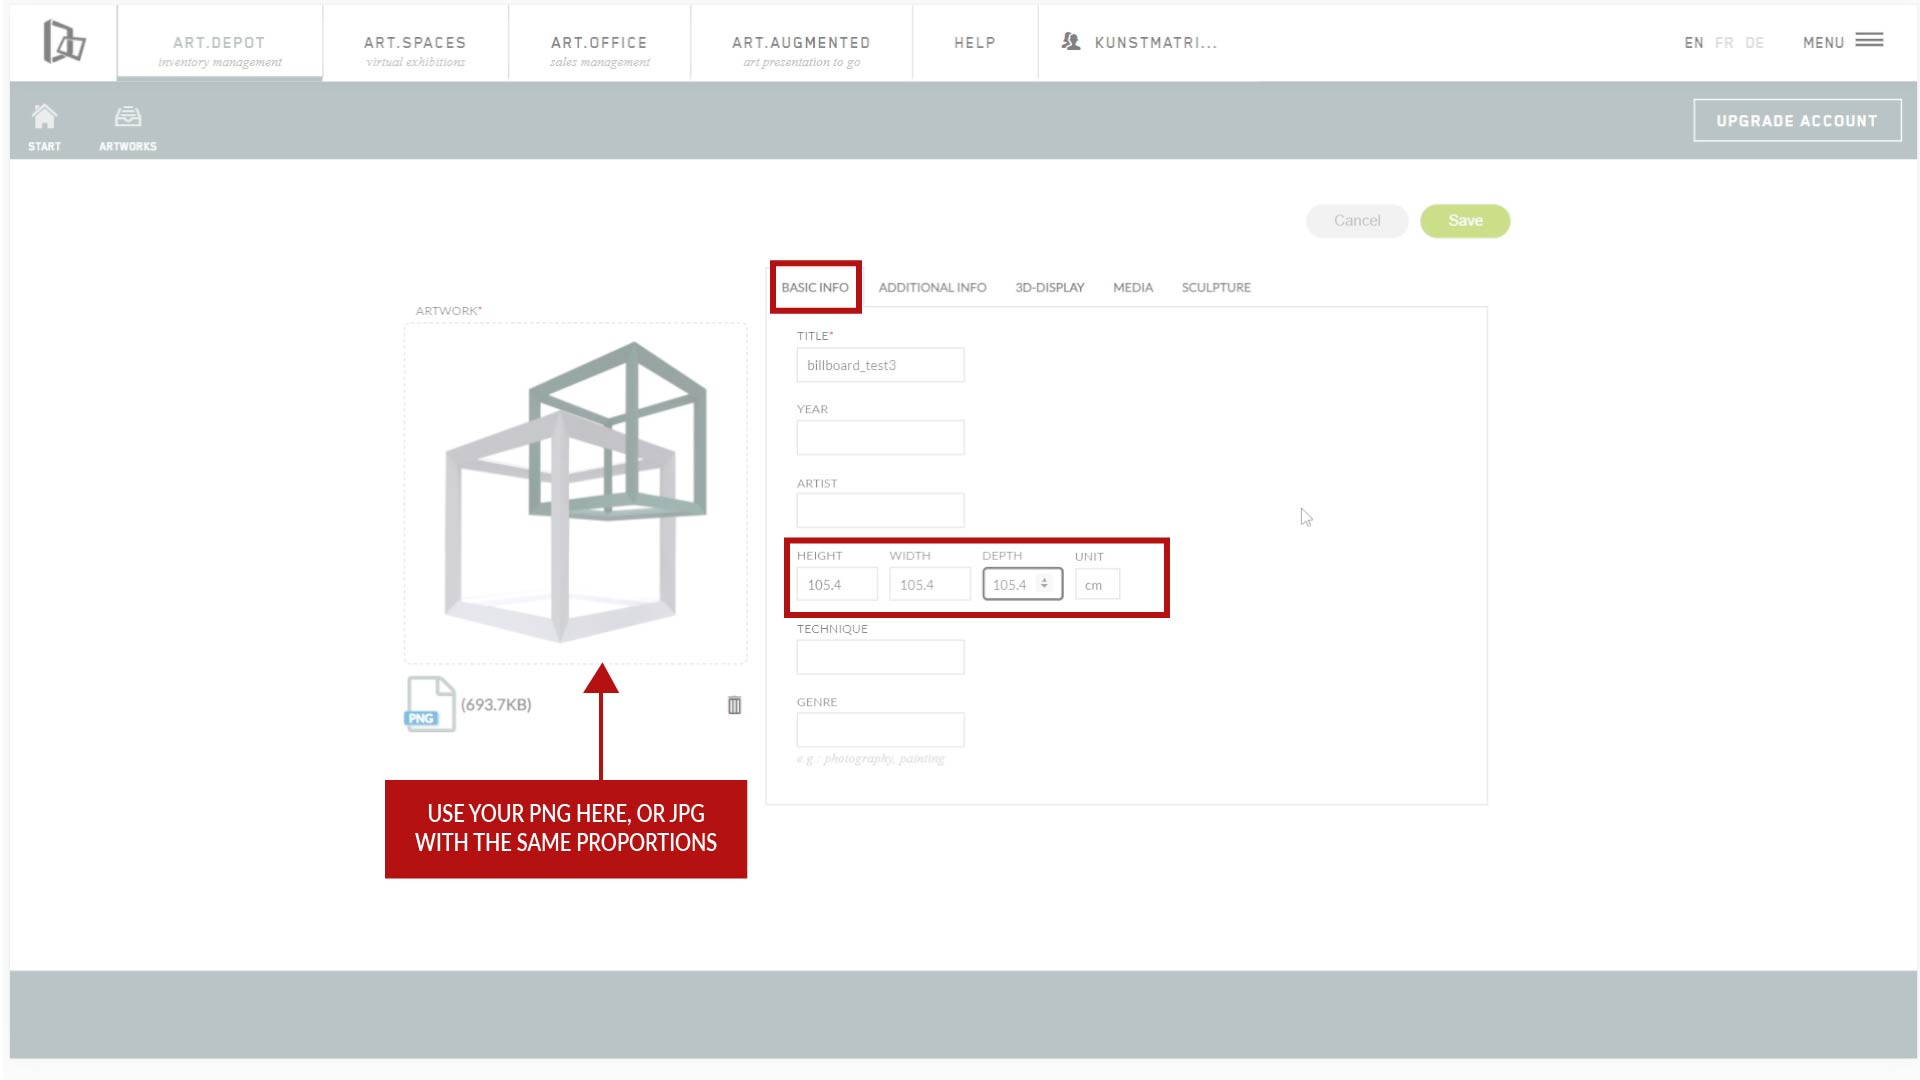
All 3 elements here need to have the same Proportions:
the actual png file(s), the Cover jpg or png and the artwork dimensions in the BASIC INFO tab, including the depth of your sculpture.
The Cover image is needed for the catalogue and your artwork manager. You can use the png for the SCULPTURE tab as a cover image also, to avoid misalignment, or an installation view of the sculpture with the same size and proportions.
When creating the actual artwork, fill in the 1st tab with all the usual information, and keep the proportions and depth in mind. Upload the jpg cover image or your png file in the BASIC INFO tab, and then proceed to the SCULPTURE tab for the actual sculpture file.
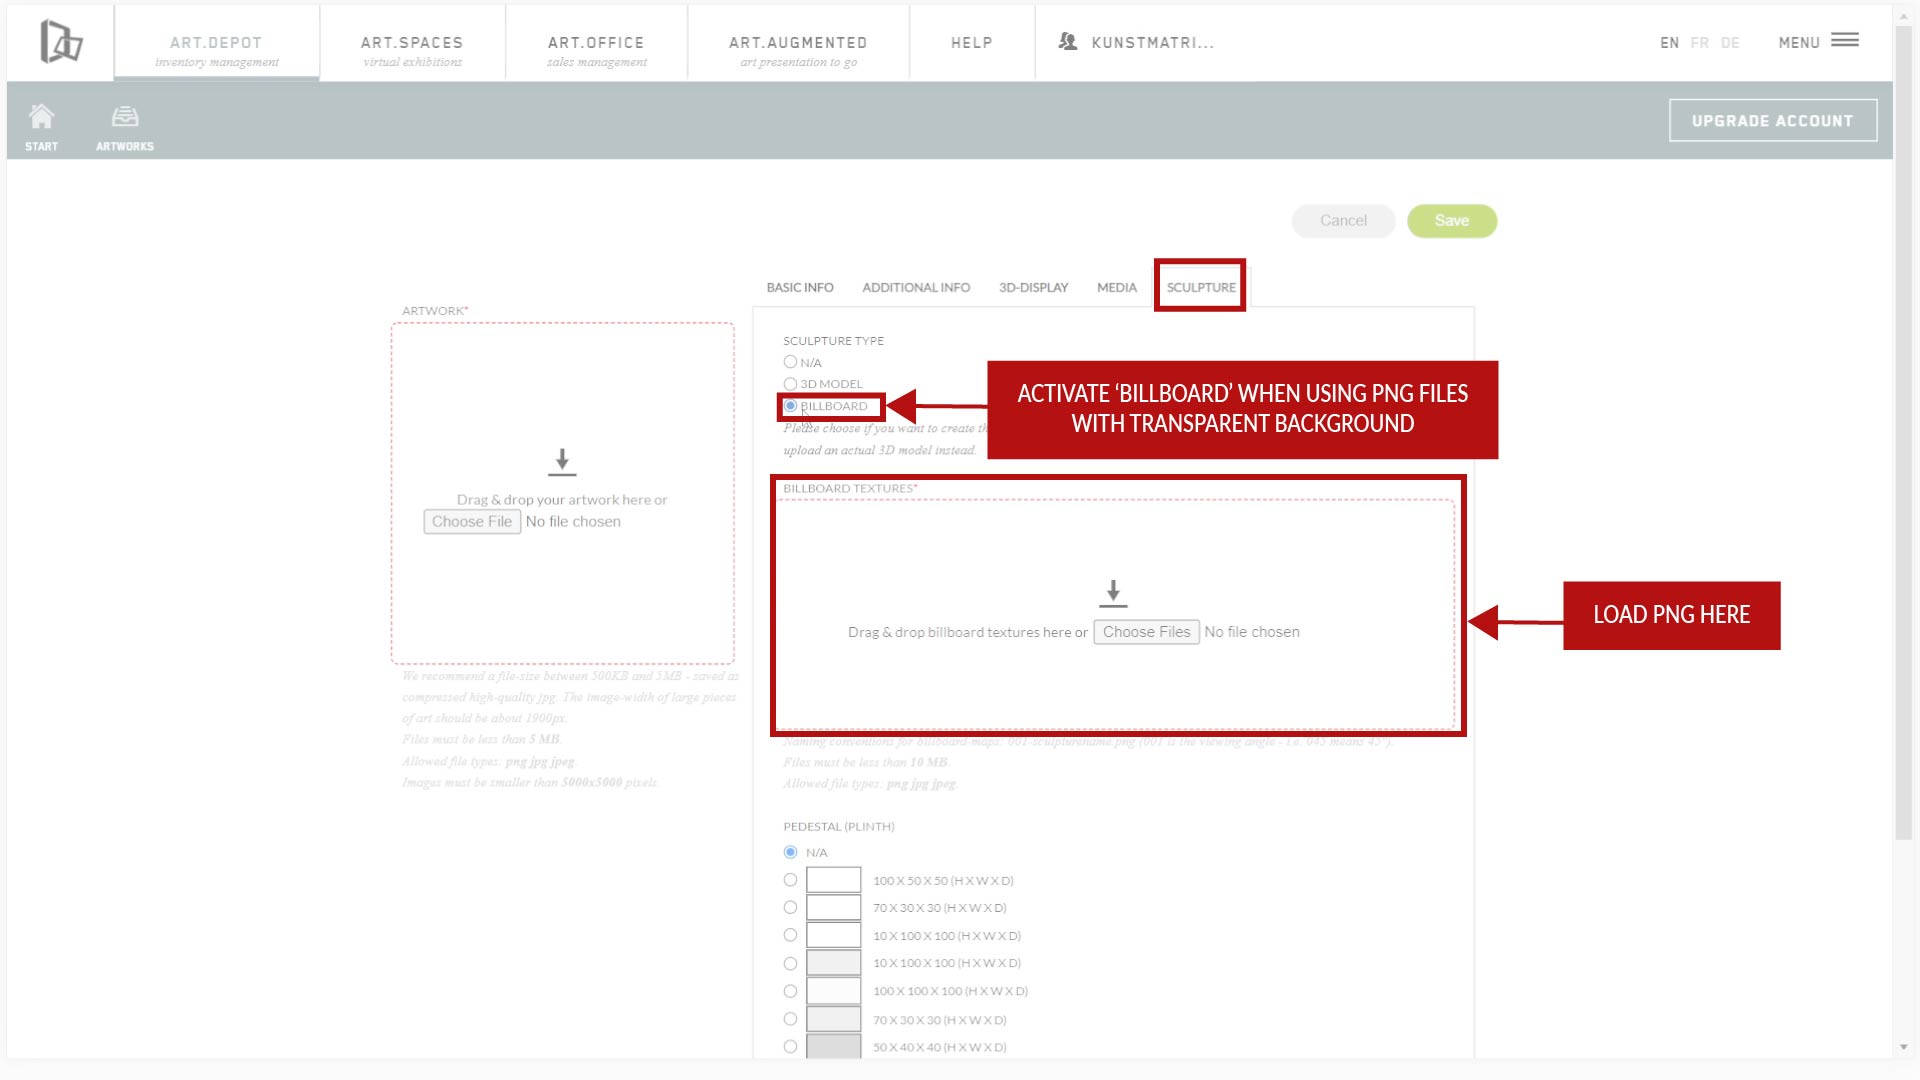
Activate BILLBOARD as your sculpture type.
Load your png file in the ‘textures’ field of the form, and decide on an optional base, then save all of this with the green button.
2
Have a Cover image prepared.
All 3 elements here need to have the same Proportions:
the actual png file(s), the Cover jpg or png and the artwork dimensions in the BASIC INFO tab, including the depth of your sculpture.
The Cover image is needed for the catalogue and your artwork manager. You can use the png for the SCULPTURE tab as a cover image also, to avoid misalignment, or an installation view of the sculpture with the same size and proportions.
When creating the actual artwork, fill in the 1st tab with all the usual information, and keep the proportions and depth in mind. Upload the jpg cover image or your png file in the BASIC INFO tab, and then proceed to the SCULPTURE tab for the actual sculpture file.
Activate BILLBOARD as your sculpture type.
Load your png file in the ‘textures’ field of the form, and decide on an optional base, then save all of this with the green button.
 3
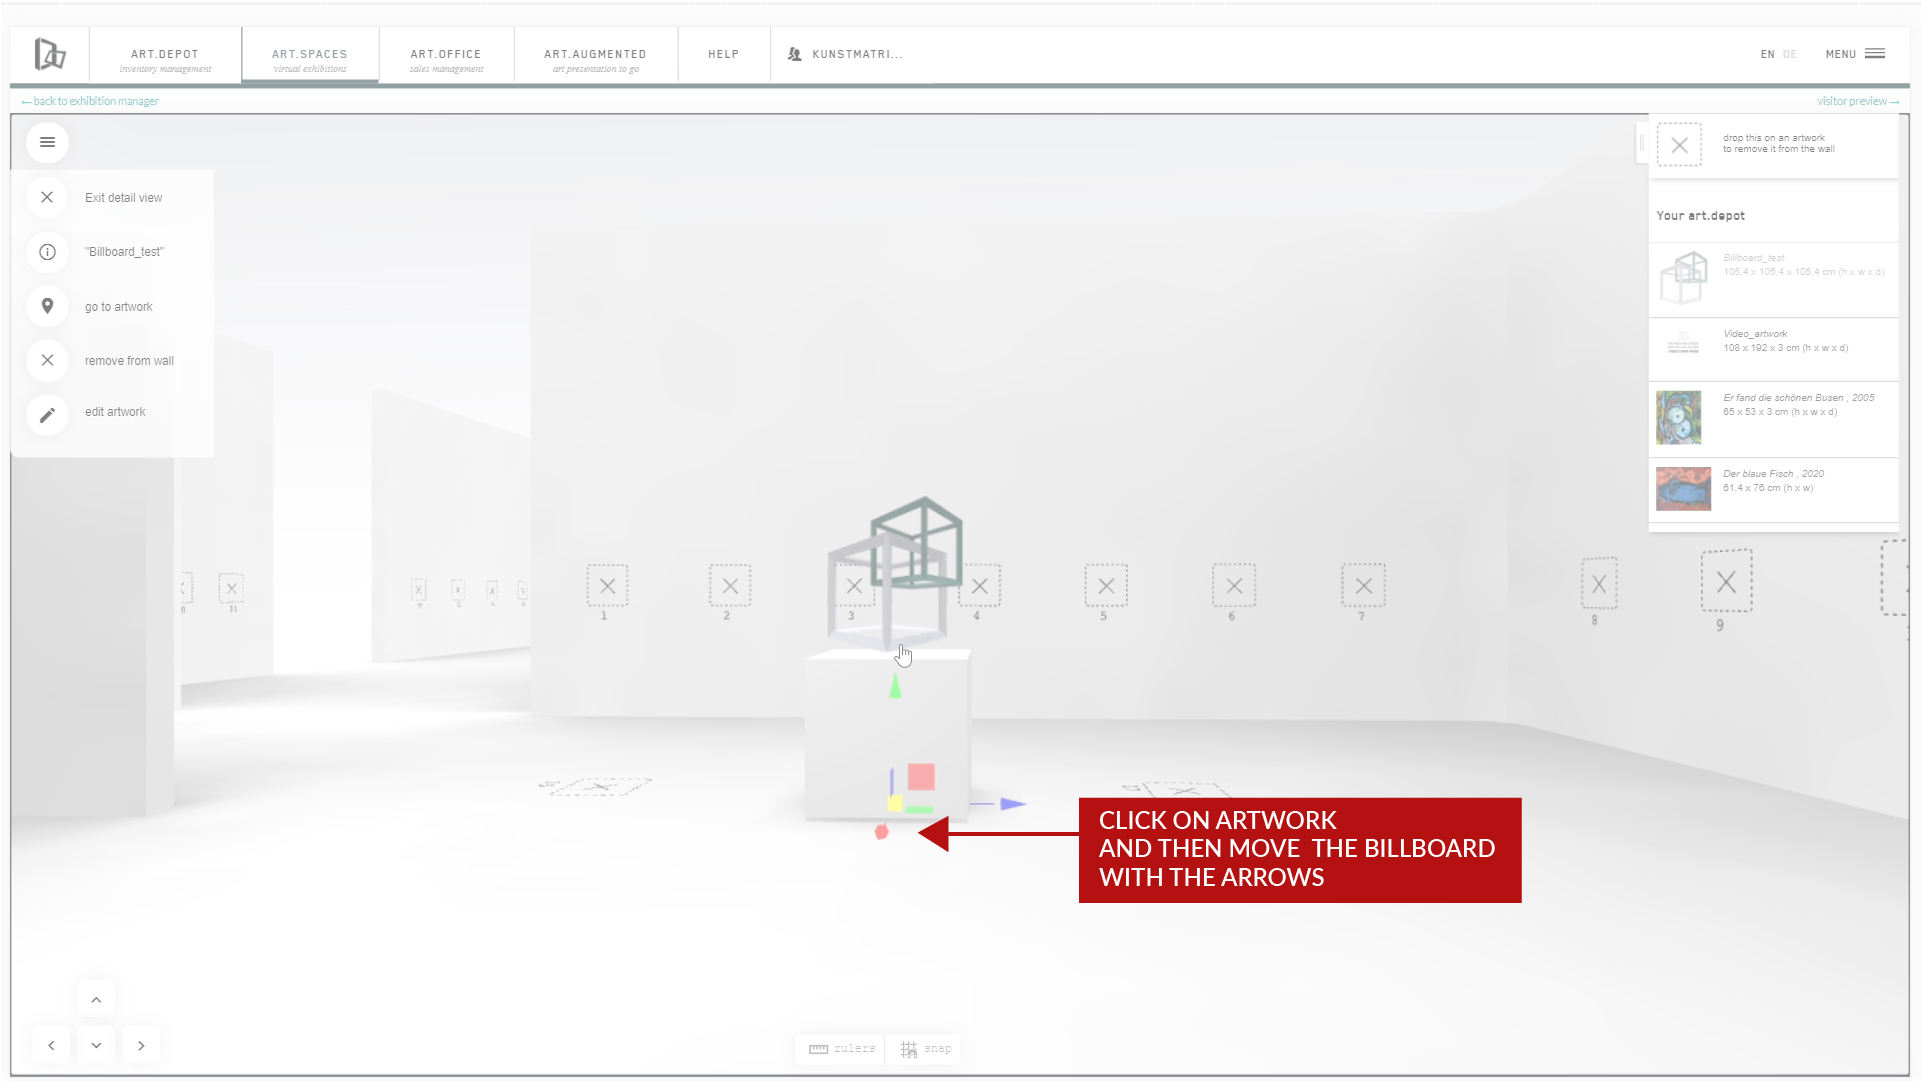
Proceed to the exhibition, to place it in there.
Find a floor placeholder, and drag it on there. Click on the sculpture for detail mode. Move it across the floor or up and down with the 3 directional arrows.
4
Advanced: working with more than 1 png file in the SCULPTURE tab
3
Proceed to the exhibition, to place it in there.
Find a floor placeholder, and drag it on there. Click on the sculpture for detail mode. Move it across the floor or up and down with the 3 directional arrows.
4
Advanced: working with more than 1 png file in the SCULPTURE tab
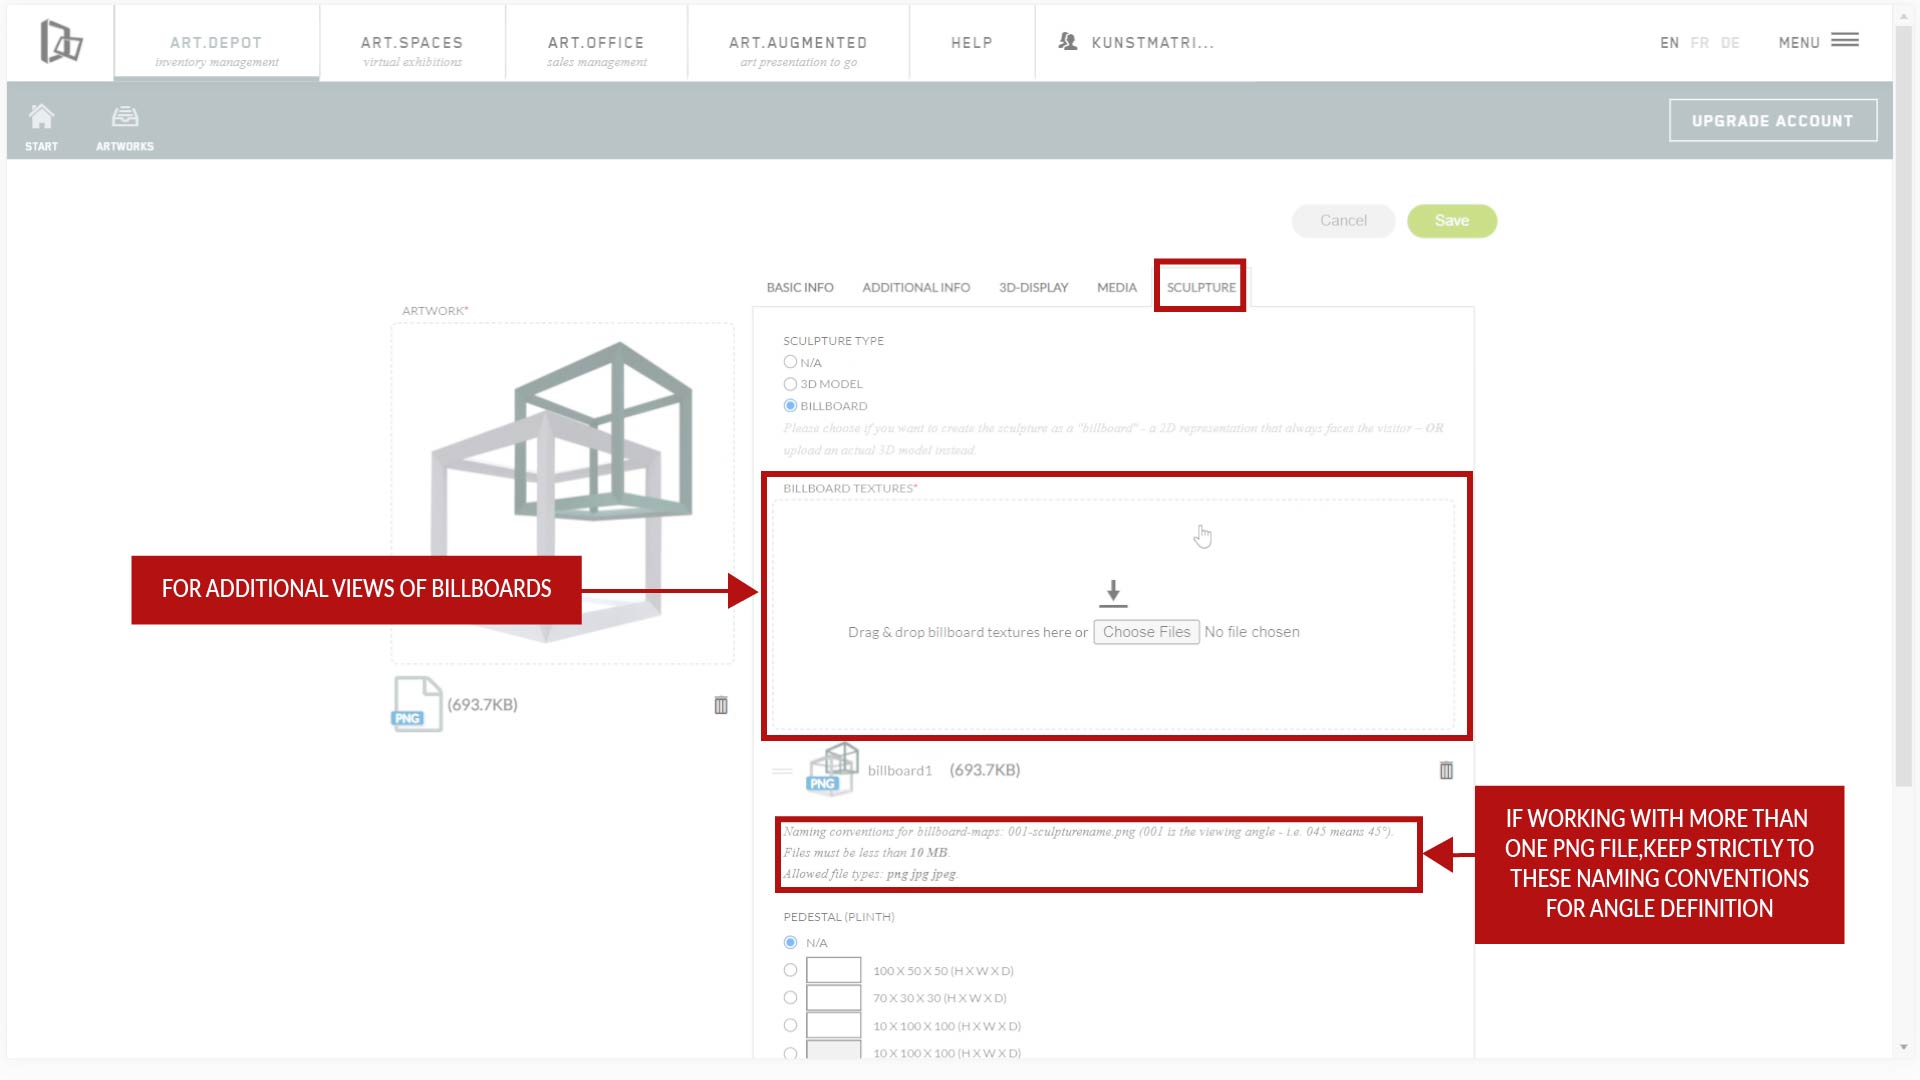 If you use several photos of the sculpture from multiple angles, they should be from the same height and distance. Set them all on transparent background and make these png files all the same width and height in pixels as well. These go into the SCULPTURE tab in ‚textures‘ as additional images.
 The order of the files there determines how the billboard behaves in the room as a reaction to the movements of the viewer. Also, pay strict attention to the naming conventions mentioned in the upload form if you work with more than 1 png file.
You can adjust the display size for billboard sculptures in the 3D-DISPLAY tab and scale them just like any 2D works. However, if you have selected a plinth or base, keep the distance to that in mind when shrinking or enlarging your Billboard.
Please note: sound and videos cannot be assigned to sculptures just yet.
If your billboard ‚floats‘ on the base, remove excess transparent pixels from the bottom of the png image used in the SCULPTURE tab.
If this changes the file proportions dramatically, adjust the cover image and especially the dimensions in the BASIC INFO tab accordingly.
You can also use wall placeholders for sculptures.
The order of the files there determines how the billboard behaves in the room as a reaction to the movements of the viewer. Also, pay strict attention to the naming conventions mentioned in the upload form if you work with more than 1 png file.
You can adjust the display size for billboard sculptures in the 3D-DISPLAY tab and scale them just like any 2D works. However, if you have selected a plinth or base, keep the distance to that in mind when shrinking or enlarging your Billboard.
Please note: sound and videos cannot be assigned to sculptures just yet.
If your billboard ‚floats‘ on the base, remove excess transparent pixels from the bottom of the png image used in the SCULPTURE tab.
If this changes the file proportions dramatically, adjust the cover image and especially the dimensions in the BASIC INFO tab accordingly.
You can also use wall placeholders for sculptures.