Scale it, frame it, snap it and tint the sides
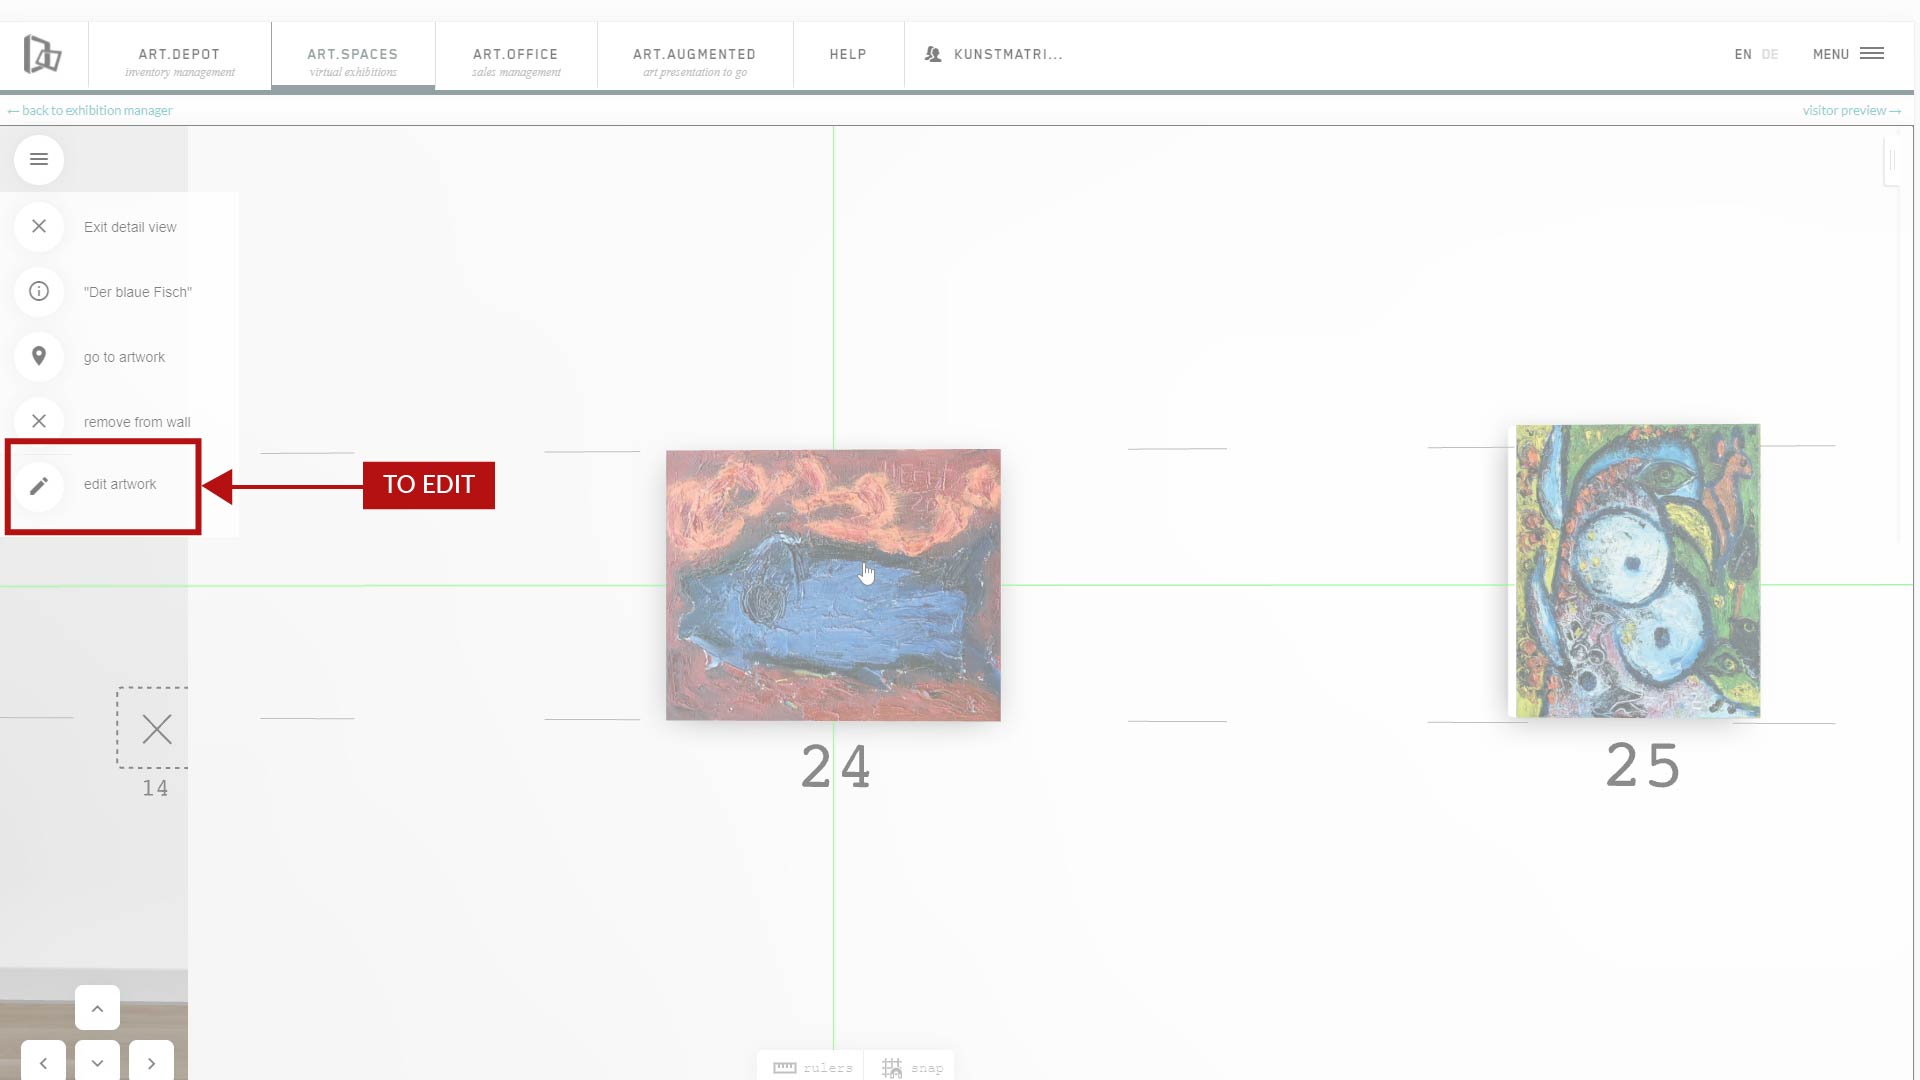
You can edit an artwork while it hangs on the wall. Go to the menu on the left, and on ‚edit artwork‘
1
Scale it
If you want to display an artwork larger or smaller than its real size (from the BASIC INFO tab), but keep the actual dimensions for the catalogue and in the detail view, you can scale it with a factor in the 3D-DISPLAY tab.
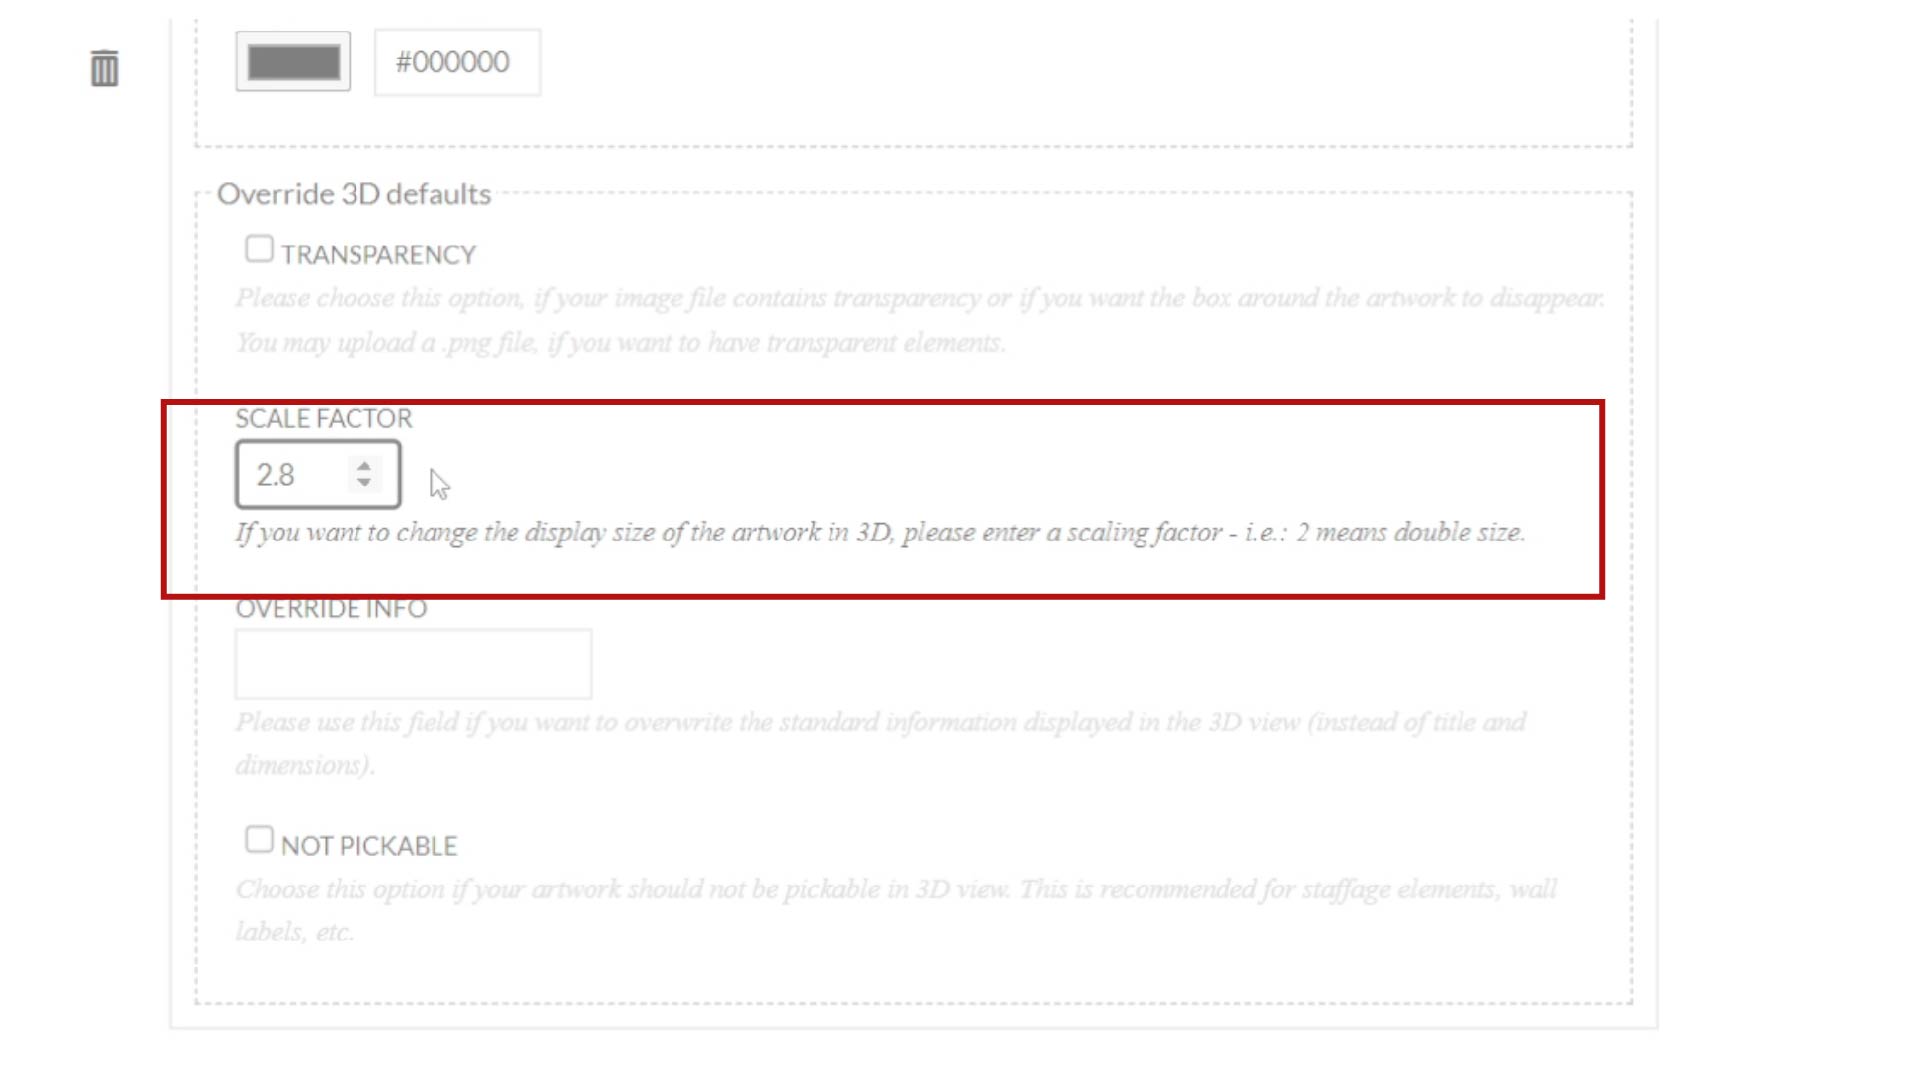
2 will make it twice larger, but a fraction factor also works well. If you want to shrink an artwork, use a value below 1 as the scaling factor.
2
Frame it
Frames and passepartouts – or mats – are also added in the 3D-DISPLAY tab of an artwork. 3 thicknesses of frames are available. You can pick the color from the wheel in that section, and also copy the # code from a master color chart.

Passepartouts or mats are assigned in the section below the frames. You need to ADD the values from the 1st tab to the size of the passepartout – making the value in the 3D-DISPLAY tab here the FINAL OUTER size of your mat, as if you were handling the actual cardboard; the image will be centered automatically within the mat.
3
Snap it to the grid
When you want to align your artworks exactly in height on the wall, use the grid system. It is activated when you are in the detail mode of an artwork, and then when activating the grid at the bottom of the screen.

If you want the artwork to snap to those, activate the button next to it, and you will see the guides with the distance to the other work or the nearest edge.
4
Tint the sides without a frame
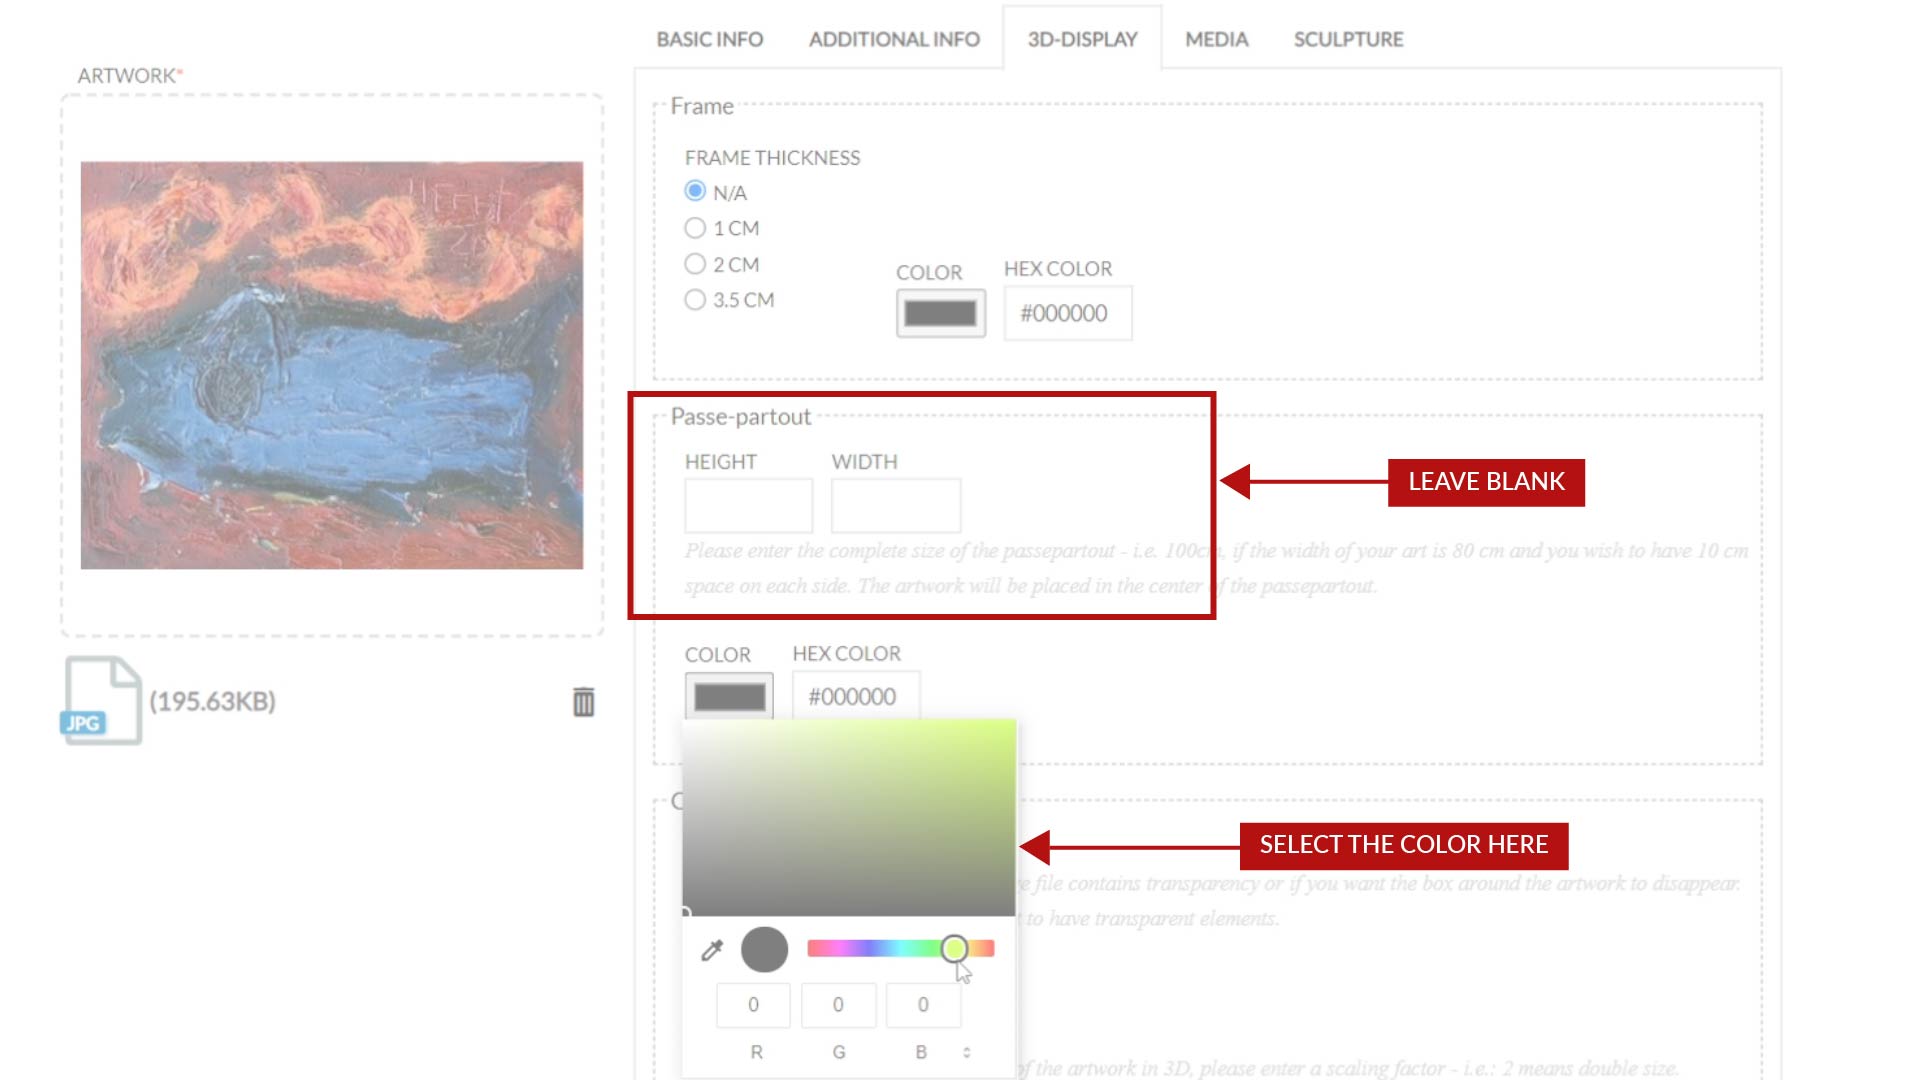
To just color the default white edges of a 2D artwork, you assign neither frame nor passepartout, but just pick a color from the wheel in the passepartout segment of the form. This color tint will then wrap around the depth that you assigned in the BASIC INFO tab of the artwork, but create no additional material thickness on the work.
This exhibition offers some examples of framing and passepartouts.