This video tutorial shows you how to upload your artworks and manage them in your ART.DEPOT. Here, you can sort existing artworks, modify them and / or add new ones, or delete them. In addition to the video, you can find the most important steps as screenshots below. Please take a look at the comments below each picture.
1
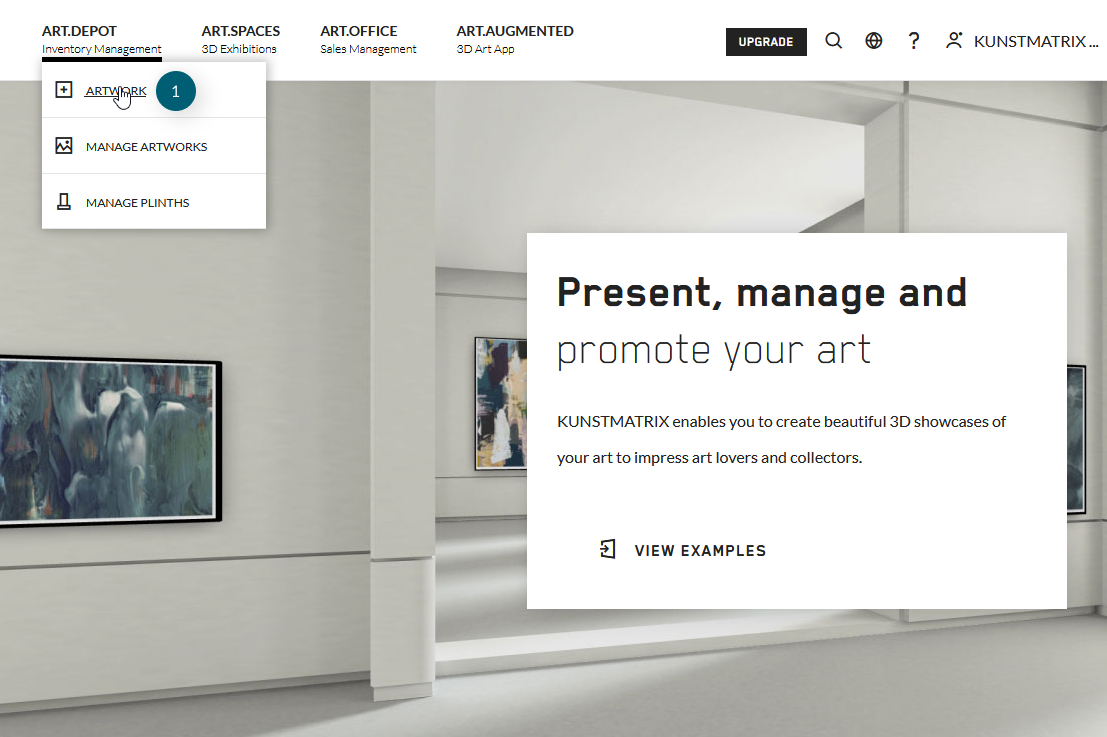
(1) click on the + Artwork button in the ART.DEPOT menu
2
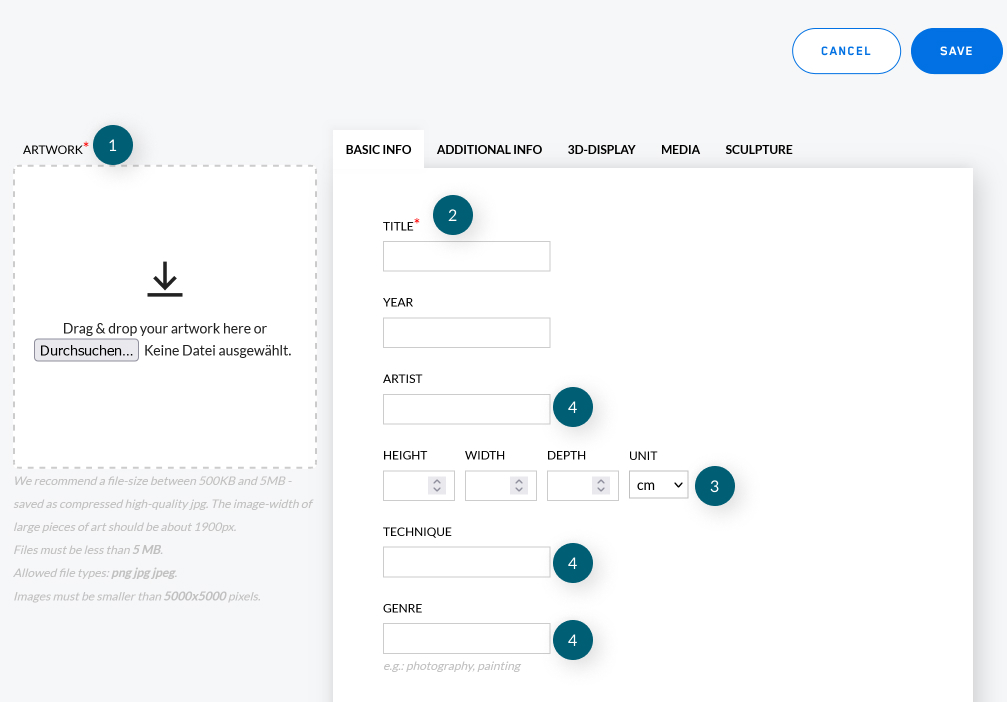
Fill in all the basic information, such as title, artist and especially the size of the work. Leaving the dimensions blank results in a default height of 1 meter. When preparing your images, have all the information at hand to fill in.
(1) Upload your image file
(2) Fill in a title
(3) Scaling the artwork to the proportionally size, unit can be switched to inches as well
(4) For easier sorting in the artwork list and exhibitions fill in the artist, technique and the genre entries.
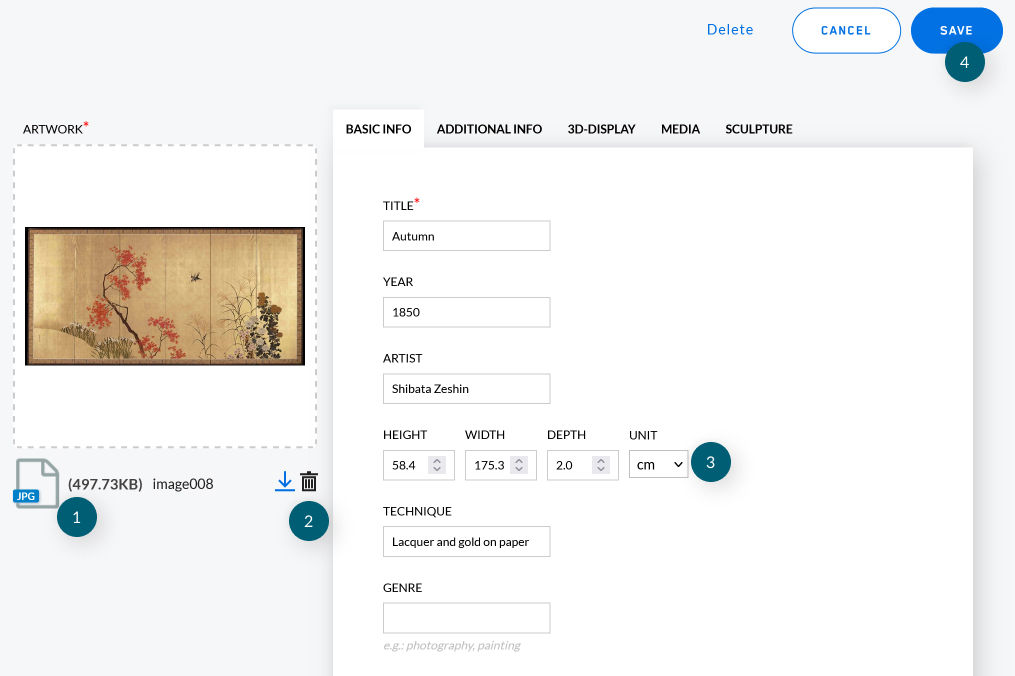
There are 5 tabs, and completing BASIC INFO tab, you may want to add extra text, a price and currency in ADDITIONAL INFO tab, and consider unlisting it, or activate transparency if needed (3D DISPLAY tab).
(1) File type and size
(2) Download or delete image
(3) Dimensions
(4) Save when done or fill in more information in the other tabs
4
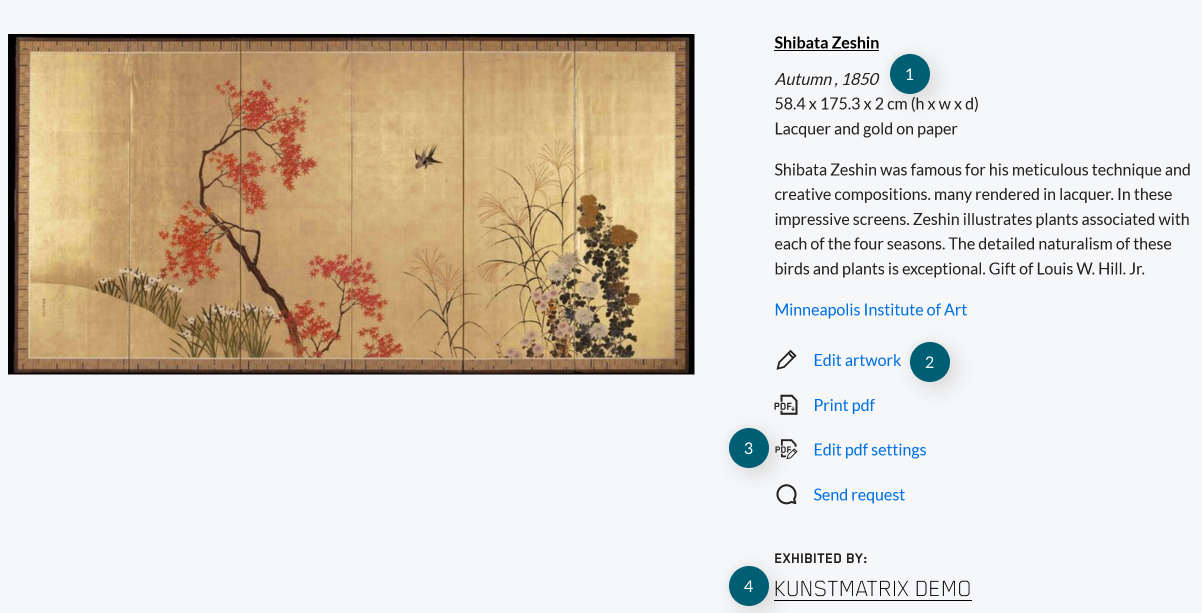
The detail view. Note the print pdf button – it will create a nice printable PDF which you can send to interested collectors.
(1) Entries from the BASIC INFO tab
(2) To edit your artwork again
(3) Edit your catalogue logo
(4) Your exhibitor profile
5
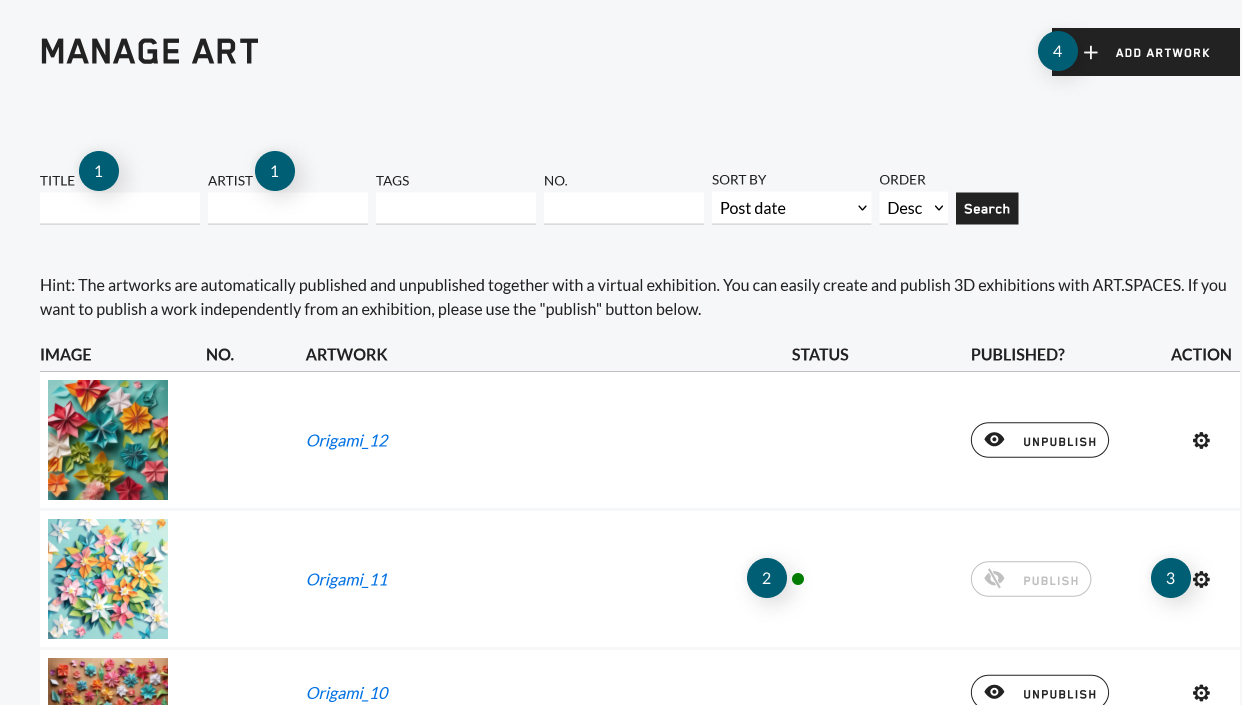
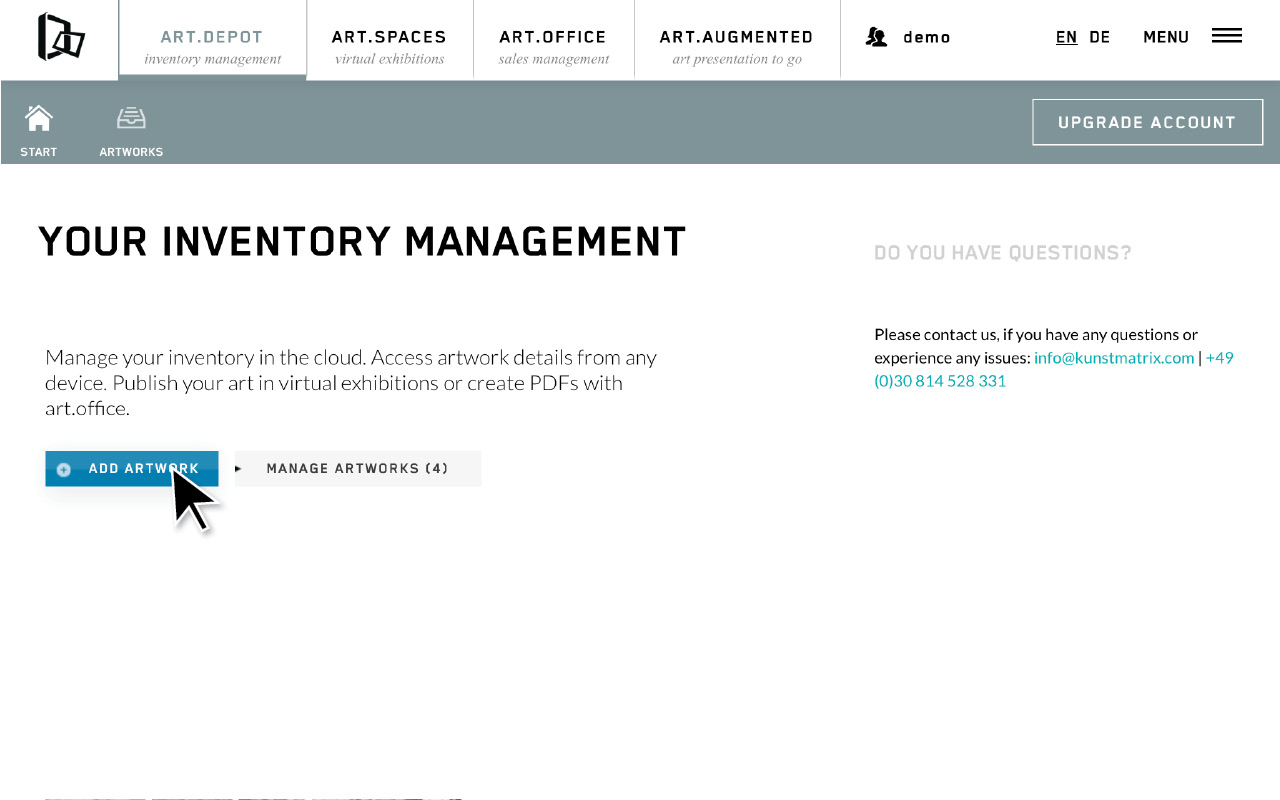
The ART.DEPOT page is an overview of all uploaded works. You can sort the works by date, by artist, by title or any other tags you may have added in the ADDITIONAL INFO tab before.
(1) Entries from the BASIC INFO tab
(2) Marked as open for sale
(3) More options
(4) Add new artwork
Further links: